Vehicle Markings
Vehicle Markings are
a complex study and this article will attempt to give a brief
overview, with emphasis on the Second World War. Topics of interest
will be studied in detail in additional articles, accessible by the
menu at left. In general, vehicle markings were applied to military
vehicles by decal, stencil or even freehand in an attempt to provide
necessary information, usually for identification purposes (unit,
individual vehicle, weight class, tactical identification, etc.).
This identification was necessary not just in the heat of battle,
but as an aid in traffic control or unit administration, etc.
Markings in the First World War were rudimentary; after the start of the Second World War an entire range of different types of markings were developed in a sophisticated system which was partially maintained through the Korean War and into the latter half of the 20th Century, though by the time of Unification many categories of vehicle markings had faded from use altogether.
Markings in the First World War were rudimentary; after the start of the Second World War an entire range of different types of markings were developed in a sophisticated system which was partially maintained through the Korean War and into the latter half of the 20th Century, though by the time of Unification many categories of vehicle markings had faded from use altogether.
First World War
The relatively small
number of motorized vehicles and their limited application in combat
meant that complicated schemes of tactical and other markings were
not required; nonetheless, there were the first beginnings of
marking schemes as seen in the Second World War. Canadian tanks at
Amiens, for example, had maple leaf devices painted on them in a
touch of nationalistic pride that would continue throughout the
century and beyond.
Second World War
A representative sample of Canadian Army overseas vehicle markings from the Second World War is given here.1Vehicle Colours
The subject of
vehicle colours is a difficult one to discuss via electronic means
due to the variance in monitor settings and a lack of consistency
regarding the actual subject matter. Colour photography was not
widespread in the Second World War, and accurate reporting of shades
and hues has been difficult to obtain. Any discussion of military
vehicle colours should be taken with that understanding in mind. The
effect of sun, age, precipitation, mud, etc. on military paint
schemes should also be taken into account when considering these
matters.
- Paint
The Canadian Army
followed closely British Army specifications for painting and
marking vehicles, as the bulk of the overseas army was located in
the United Kingdom before combat employment in Europe. As the
Canadian Army preferred to draw its equipment from domestic sources,
some modifications to this practice were made; some vehicles came
from British stocks in the UK early in the war, and the 5th Canadian
(Armoured) Division drew a large number of British vehicles when it
arrived in Italy in late 1943. Paint manufactured in Canada was done
to British requirements as described by their War Office, though
some modifications were made on occasion to comply with
manufacturing conditions in Canada.
The basic
requirements as laid down by the War Office were that paint be of a
flat ("matte") finish, in order to reduce reflectiveness. Paint had
to be able to be resistant to poison gas, and easily decontaminated.
The use of lead compounds was subject to restrictions, as the
dangers of lead poisoning were known at the time and were especially
applied to paint used on vehicle interiors, particularly armoured
vehicles.
Paint schemes
consisted of a "basic" colour, which was applied to the whole of the
vehicle (usually at the factory, with disruptive or camouflage
colours applied overtop by brush or spray. Vehicles were usually
painted the same basic colour at the factory - a drab green or brown
- and repainted if necessary by the Army (in the event of, for
example, employment in the desert or in snow-covered terrrain).
- 1939
Military Training
Pamphlet issued in the UK in June 1939 outlined a basic series of
two-colour camouflage schemes, and it is believed the Canadian Army
adopted these on the outbreak of war. A series of horizontal
patterns of Khaki Green G3 (No.23 Middle Bronze Green) and Light
Green No.5 (Light Bronze Green) were applied to vehicles.
According to the
Milifax article
The date for this change was December 1940 according to one source, which described the colour unhelpfully as a "very dark grey, almost black, with just a hint of green...unless it's blue."2At some as yet undiscovered time shortly hererafter, the British (and the Canadians) replaced Light Green No.5 with a colour known as Nobel's Dark Tarmac No.4. To the best of our knowledge in 2002, the colour is best described as a dark, muddy gray.
- 1941
Amendments in 1941
changed the colours used on canvas tops and hoods, and this change
is noted in Canadian Army Routine Orders (Overseas) on 14 October
1941. The change was the result of paints at that time causing
damage to canvas.
In future, the following paints will be used for the disruptive painting of canvas covers and hoods of vehicles, and demands will be submitted as necessary through the D.A.D.O.S. of the formation to the Canadian Stores Depot, Crookham.
| Catalogue No. HA | Section H-1 Paint, camouflage, bituminous emulsion |
| 6188 | Standard Colour No.1A |
| 6179 | Standard Colour No.7 |
- New Colours
At this time as well, a series of
Standard Camouflage Colours (SCC) were introduced to supplement, and later
replace, Greens G3 and G5. The new colours were produced in both
enamel for wood and metal vehicles, and in "bituminous emulsion" for
use on canvas.
-
SCC No. 1a Very Dark Brown
-
SCC No. 2 Dark Brown / Service Colour / Service Drab
-
SCC No. 4 Dark Earth (not to be confused with a shade used by the Royal Air Force of the same name)
-
SCC No. 5 Light Mud
-
SCC No. 7 Dark Olive Green
-
SCC No. 11b Desert Pink
-
SCC No. 13 Jungle Green
-
SCC No. 14 Black, also known as Charcoal
-
SCC No. 15 Olive Drab
A month after the
above regulations on canvas were promulgated, new orders were
published by Canadian Military Headquarters, stating that only the
new "paint, camouflage, bituminous emulsion" would be used on
vehicle canvas. The orders outlined several colours:
-
For the top of hoods and the dark part of pattern at sides:
-
Catalogue No. HA6188 Standard Camouflage Colour No. 1A (Very Dark Brown), or failing that
-
Catalogue No. HA6184 Standard Camouflage Colour No. 14 (Black)
-
-
For restoring the basic khaki colour of the sides of faded hoods:
-
Catalogue No.HA6194 Standard Camouflage Colour No. 2 (Service Drab)
-
The whole of the upturned surfaces of hoods will in future be painted with the dark colour, standard camouflage colour No.1A, or failing that, standard camouflage colour No.14
The basic colour was
changed from dark green to a dark brown, Standard Camouflage Colour
No.2 (SCC No.2), a dark brown, due to shortages of chromic oxide,
used in the production of green paint. Existing paint stocks of
green were reserved for use on combat aircraft.
However, older
vehicles were not repainted until it was necessary due to major
overhauls, severe fading, modifications, or other similar reasons.
Painting was not done solely to change the colour to conform to
other vehicles in the new basic colour, as that was considered a
waste of resources.
The complete list of
the new SCCs was published in 1942, with, according to Hodges and
Taylor, "idiosyncratic descriptions of the colours" with no
explanation of what was meant by "dangerous."3
| Colour | Description in British Army MTP 46 |
| SCC 1 | Brown |
| SCC 1A | Very dark brown |
| SCC 2 | Cup of coffee and milk |
| SCC 3 | Cup of tea |
| SCC 4 | Cup of weak tea |
| SCC 5 | Very light grey |
| SCC 6 | Dark green |
| SCC 6A | Very dark green |
| SCC 7 | A useful warm green |
| SCC 8 | Mid green (rather dangerous) |
| SCC 9 | Light green (very dangerous) |
| SCC 10 | Useful dull red |
| SCC 11 | Rusty red |
| SCC 11A | Bungalow tiles red |
| SCC 11B | Sandy pink |
| SCC 12 | Clean cold grey |
| SCC 13 | Dirty grey |
| SCC 14 | Black |
- 1942
In 1942, a new
camouflage scheme was ordered into use, as detailed in Canadian Army
Overseas Routine Order 2383 and Army Council Instruction 1160.4

- 1944
Vehicle Markings
From early in the
war, the British regulated a system of vehicle markings that they
had created before the war and continued to evolve and administer
after the war began in 1939. As the British and Canadian armies grew
to meet the demand for new and different types of formations, the
need for unique systems of identification also arose. In May 1940, a
memorandum noted that:
To ensure efficient traffic control the following signs are necessary:(a) Divisional Sign.(b) Unit Sign.(c) Bridge Classification Sign.5
Formation Signs
When the 1st Canadian Division arrived in the United Kingdom in December 1939, the need to identify its vehicles was made apparent, not for matters of national pride but for practical purposes of traffic control (vehicles travelling in large convoys would need to be directed at traffic control points according to which unit or formation they belonged to) or unit administration. Formation signs are illustrated in a separate article with some explanatory notes on their design.
When the 1st Canadian Division arrived in the United Kingdom in December 1939, the need to identify its vehicles was made apparent, not for matters of national pride but for practical purposes of traffic control (vehicles travelling in large convoys would need to be directed at traffic control points according to which unit or formation they belonged to) or unit administration. Formation signs are illustrated in a separate article with some explanatory notes on their design.
Formation signs
eventually measured 6-1/2 inches high by 9 inches wide and were
painted on the left front and right rear fenders of vehicles, or the
corresponding position if the vehicle did not have fenders. In 1942,
formation signs came to include Division, Corps and Army signs, as
additional formations arrived in England. Some independent brigades
and units had their own formation signs as well.
Unit Signs
The purpose of unit signs was to ensure efficient traffic control and assist in recognition. Unit signs consisted of a Serial, usually in white, painted over a coloured background denoting the Arm of Service or Brigade that the unit belonged to. The Unit Signs were originally coloured plates attached to vehicles by means of metal frames. According to regulations issued early in the war:
The purpose of unit signs was to ensure efficient traffic control and assist in recognition. Unit signs consisted of a Serial, usually in white, painted over a coloured background denoting the Arm of Service or Brigade that the unit belonged to. The Unit Signs were originally coloured plates attached to vehicles by means of metal frames. According to regulations issued early in the war:
Each vehicle will have two removable colour plates fitted with permanent frames. The size of the plates will be approximately 9-1/2 by 8-1/2 inches. The fitment of plates will differ with varying types of vehicles and cannot be standardised. These plates are being provided by the A.M.G.O. Canadian Military Headquarters. In some cases a unit may receive a vehicle with only one plate and holder, this is due to the orders for the fittings falling behind the production rate of the vehicles at the Canadian Mechanization Depot...The holders are placed on the off side mudguard and the off side of the tailboard.The Serial Numbers and colouring for Div. and Corps Troops are shown at Appx. "C". It will be noted that in the case of Corps units a white horizontal 2 inch bar will be painted above the serial number.If plates are not available the colours corresponding to the size of the plate will be painted on the vehicle.The reverse side of the plates will be coloured khaki with "PASS" stenciled on it in white letters. By reversing the plate it will thus be possible to indicate to (Motor Transport) in rear that a vehicle is out of action and should be passed. Vehicles without plates will carry "PASS" signs as a temporary measure.6
Unit Signs consisted
of two elements, and Arm of Service flash and a Serial Number. The
Arm of Service flash indicated which corps or service the unit was,
and the Serial Number (not to be confused with a Unit Serial, a
distinctive 3 or 4 digit number that identified each unit upon
mobilization) designated a specific unit.
Early in the war, a
standard sequence of serial numbers was assigned for each unit in
corps and divisions, to be assigned as needed. The system quickly
grew beyond control as a plethora of units were created, new arm of
service colours had to be adopted (for Britain's new Reconnaissance
Corps and the Royal (Canadian) Electrical and Mechanical Engineers).
As well, markings for units outside of division and corps
organization had to be established (i.e. independent tank brigades,
Army-level units, Line of Communications troops, etc.)
| Corps Troops | Divisional Troops | ||||
| Serial No. | Unit(s) | Flash | Serial No. | Unit(s) | Flash |
| 17 |
HQ, Corps Employment Platoon Corps Sec Intelligence Corps |
 |
40 |
HQ of Division Employment Platoon Sec Intelligence Corps |
|
| 18-22 | Spare for HQ units | 40 | HQ of Divisional Artillery |
 |
|
| 17 | HQ, Corps Artillery |
|
40 | HQ of Divisional Engineers |
 |
| 1 | HQ, Med Artillery | 40 | HQ of Divisional Royal Army Service Corps |
 |
|
| 2 | Field Regiment |
41
|
Division Royal Armoured Corps |
|
|
| 3 | Field Regiment | 42 | Field Regiment |
|
|
| 4 | Spare | 43 | Field Regiment | ||
| 5 | Medium Regiment (Howitzer) | 44 | Field Regiment | ||
| 6 | Medium Regiment (Howitzer) | 46 | Anti-Tank Regiment | ||
| 7-8 | Spare for Artillery units | 48 | Field Park Company |
|
|
| 10 | Survey Regiment | 49 | Field Park Company | ||
| 11 | Anti-Aircraft Regiment | 50 | Field Company | ||
| 12 | Anti-Aircraft Regiment | 51 | Field Company | ||
| 13 | Anti-Aircraft Regiment | 52 | Divisional Signals |
|
|
| 14 | Light Anti-Aircraft Regiment | 81 | HQ, Senior Infantry Brigade |
 |
|
| 15-16 | Spares for A.A. Units | 54 | Senior Infantry Brigade Anti-Tank Company | ||
| 33 | HQ, Corps Troops Engineers |
|
55 | Senior Infantry Brigade Infantry Regiment | |
| 34 | Field Park Company | 56 | Senior Infantry Brigade Infantry Regiment | ||
| 35 | Army Field Company | 57 | Senior Infantry Brigade Infantry Regiment | ||
| 36 | Army Field Company | 87 | HQ, 2 Infantry Brigade |
 |
|
| 37 | Army Field Company | 59 | 2 Infantry Brigade Anti-Tank Company | ||
| 38 | Corps Field Survey Company | 60 | 2 Infantry Brigade Infantry Regiment | ||
| 39-40 | Spare for Engineers | 61 | 2 Infantry Brigade Infantry Regiment | ||
| 41 | Corps Signals |
|
62 | 2 Infantry Brigade Infantry Regiment | |
| 42 | Spare for Signals Unit | 94 | HQ, Junior Infantry Brigade |
 |
|
| Note for Signal Sections and Light Aid Detachments: Sig Secs and LADs attached to Inf Bdes or Arty and other units will adopt both the serial no and the colour of the formation or unit to which they are attached. | 64 | Junior Infantry Brigade Anti-Tank Company | |||
| 44 | Spare for MG Battalion |
|
67 | Junior Infantry Brigade Infantry Regiment | |
| 45 | MG Battalion | 68 | Junior Infantry Brigade Infantry Regiment | ||
| 46 | MG Battalion | 69 | Junior Infantry Brigade Infantry Regiment | ||
| 47 | MG Battalion | 70 | Divisional Ammunition Company, RASC |
|
|
| 48-49 | Spare for MG Battalions | 71 | Divisional Petrol Company | ||
| 50 | HQ, RASC Corps |
|
72 | Divisional Supply Column | |
| 51 | C.T. Amn Coy | 73 | Troop Carrying Company | ||
| 52 | C.T. Sup Column | 74 | Troop Carrying Company | ||
| 53 | Corps Ammunition Park | 75 | Field Ambulance, RAMC |
|
|
| 54 | Corps Petrol Park | 76 | Field Ambulance, RAMC | ||
| 55 | Indian Animal Transport Company | 77 | Field Ambulance, RAMC | ||
| 56 | Cypriot Pack Transport Company | 78 | Field Hygiene Section, RAMC | ||
| 57 | RASC Secs for Animal Transport Company | 79 | Divisional Provost Company | ||
| 58 | Secs Sup Personnel Company | 80 | Divisional Postal Unit | ||
| 59 | Secs Sup Personnel Company | ||||
| 60-63 | Spares for RASC Units | ||||
| 64 | MAC (Royal Army Medical Corps) |
|
|||
| 65 | Field Ambulance | ||||
| 66 | Field Hygiene Section | ||||
| 67 | All Mobile Bath Units | ||||
| 68 | Spare for RAMC Unit | ||||
| 69 | Ordnance Field Park, Royal Army Ordnance Corps | ||||
| 70 | Army Field Workshop, RAOC | ||||
| 71 | Army Field Workshop, RAOC | ||||
| 72 | Army Field Workshop, RAOC | ||||
| 73-75 | Spares for RAOC | ||||
| 76 | Field Cash Office, Pay Corps | ||||
| 77 | Field Cash Office, Pay Corps | ||||
| 78 | Field Cash Office, Pay Corps | ||||
| 81 | AMPC Company | ||||
| 83 | Provost Companies | ||||
| 84 | Corps Postal Unit | ||||
| 85 | Corps Salvage Units | ||||
As early as July
1940, the Canadians were putting in requests to the British War
Office for special requirements due to units that did not match
these official markings. Needless to say, the catch-all regulations
which included such things as Cypriot pack animals would not stand
the Canadians in good stead. By the mid-war period, the actual Arm
of Service colours and serials in use looked quite different. Orders
in 1942 specified the size of the coloured square background as
9-1/2" x 8-1/2" and provided a policy for placement as follows:
The posn of the unit sign will be on the off-side front mudguard or some similar posn to the front and on the near-side on the rear of the veh or some similar posn to the rear. On motorcycles and motorcycle combinations, the unit sign will be painted on tip of mudguard, both front and rear, with size reduced proportionately. Unit signs will not be painted on or fitted to trailers.
A selection of Unit
Signs are provided in separate articles. The colour schemes used by
the mid-war period grew to include:
|
|
Red-over-Blue: Royal Canadian Artillery |
 |
Green-over-Blue: Reconnaissance |
|
|
Light Blue: Royal Canadian Engineers |
 |
Diagonal Green\Red: Royal Canadian Army Service Corps. (The diagonal from upper left to bottom right is the opposite of that used by the Royal Army Service Corps of the British Army.) |
 |
Blue-Red-Blue: Royal Canadian
Ordnance Corps
(Authorized in December 1943)7
|
 |
White-over-Blue: Royal Canadian Corps of Signals |
 |
Blue-over-Yellow-over-Red: Royal Canadian Electrical and Mechanical Engineers (introduced in 1944). |
|
Headquarters and units of other corps/services (i.e. Royal Canadian Army Medical Corps, Canadian Provost Corps, Royal Canadian Army Pay Corps, Canadian Postal Corps, etc.) |
|
|
Red: Senior brigade of an infantry or armoured division as well as some independent armoured and infantry brigades. |
|
Green: Intermediate brigade of an infantry division. |
|
|
Brown: Junior brigade of an infantry or armoured division. |
 |
Blue-over-brown: Some independent armoured brigades. |
 |
Early in the war, vehicles were required to carry a "PASS" sign on a khaki background, to replace the Unit Sign when the vehicle was disabled. |
|
On
motorcycles, the unit signs were painted on both fenders,
reduced in size. They can also be seen on the gas tanks of
some motorcycles as well.
In 1942, the
unit signs were moved to the right front and left rear
fenders, and the PASS sign was dispensed with. The metal
signs and brackets were used until the signs (or the
vehicles) were no longer serviceable.
At this time
also, serial numbers of Signals units was changed from white
to red. General HQ and Army transport units added a 2-inch
wide horizontal bar below their serial number.
|
 Restored Canadian truck (Truck, 8-cwt, GS), showing the PASS sign. |

For Troop Carrying
Vehicles or other transports such as busses, removable plates twice
the height of the normal unit signs were fitted into brackets, on
the right front and left rear fenders. The lower half was painted
with the standard unit sign of the vehicle's unit, while the upper
half was painted in black. When the vehicles carried troops, the
serial number of their unit (referring to the three or four digit
number assigned to the unit upon mobilization, not the Serial
painted on their vehicles' Unit Signs) was chalked onto this black
square.
Tactical Signs
Tactical
signs denoted the role of a vehicle within its own unit. The
special geometric-shaped tactical signs of the armoured
regiments are most commonly known, and the red and blue
tactical markings of artillery regiments have been widely
discussed in various hobby publications, but in matter of
fact all units, be they echelon, base, or even infantry
battalions, utilized them to to help designate special
roles, functions or equipment performed/carried by certain
vehicles. In general the signs measured 8 by 6 inches,
painted in black with a 5/8-inch yellow border, and having
yellow characters 5-8" in thickness not to exceed 2-1/2"
wide and 3-1/2" high.8 These signs were generally
applied to the right front bumper (or fender) and located on
the rear centre of the vehicle's body, though sometimes it
was located instead on the right rear near the formation
sign. The signs were also placed on vehicle sides, either
centrally on the leading door, on the turret of armoured
vehicles, or on the body of Universal Carriers. The numbers
were standardized by individual corps and services, and for
infantry units and formation headquarters, by First Canadian
Army.
|
 2nd Canadian Division jeep in 1945; the middle marking on the windshield frame is a tactical sign as seen in artillery regiments. DND Photo. |
War Department/Census Numbers
Vehicles were identified by unique numbers assigned to them, with two different systems used by the Canadian Army.- Canada
In Canada, vehicles
were designated by a census style designation in the format
yy-n-nnnn (year/number). The yy represented the year of acquisition
of the vehicle while the n-nnnn represented the sequential number of
the vehicle acquired that year.i.e., 38-1-243 represented the
1,243rd vehicle obtained in 1938. This system may have changed in
1942.
- Interim
Until Census Numbers had been allocated by the RCOC, all vehicles on assembly in the UK to Canadian contract acquired "CMD" prefixes with numbers in batches allocated to each assembly point. This stood for Canadian Mechanization Depot, although there were only two CMDs...and Southampton was bombed 30 November 1940 leaving just Citroen Cars, Slough, premises, as the sole CMD. However Canadian Mechanization HQ remained at 2,3 & 4 Cockspur Street, London SW1 behind the Canadian High Commission. It must have seemed logical to retain the "CMD" prefix...which acted as a "trade plate" to move vehicles around without Census Numbers.
- Overseas
Elements of the
Canadian Army in the UK initially came under the command of British
formations and transport was originally drawn from British sources.
British census numbers were adopted (known correctly as War
Department (WD) Numbers). These numbers were unique identifiers,
used in conjunction with a letter prefix identifying the type of
vehicle. Early on, the use of a "C" prefix to identify Canadian
vehicles was also adopted.
These numbers were to
be 3-1/2 inches high, and were painted in white, either
horizontally, or if there was no room, diagonally, on the hood of
cars and trucks, or on the body of tanks and armoured vehicles.
Motorcycles and some trucks had the WD number on the sides of gas
tanks. WD numbers also appeared on the back of vehicles; for trucks
they were located centrally, 4 inches above the tailgate, and on
jeeps they were painted on the left side.
| CA | Ambulance | CM | Car (staff car, jeep, etc.) |
| CC | Motorcycle | CS | Self-Propelled Gun |
| CF | Armoured Car or Scout Car | CT | Universal Carrier or Tank |
| CH | Tractors (ie Artillery tractors) | CX | Trailers of all types |
| CL | Lorry (30 cwt or heavier) | CZ | Truck (15 cwt and smaller) |
 |
 |
|
 |
Bridge Classification Signs

 In
order to help bridge sentries determine the weight of vehicles
wanting to cross them, bridging discs were added to Canadian
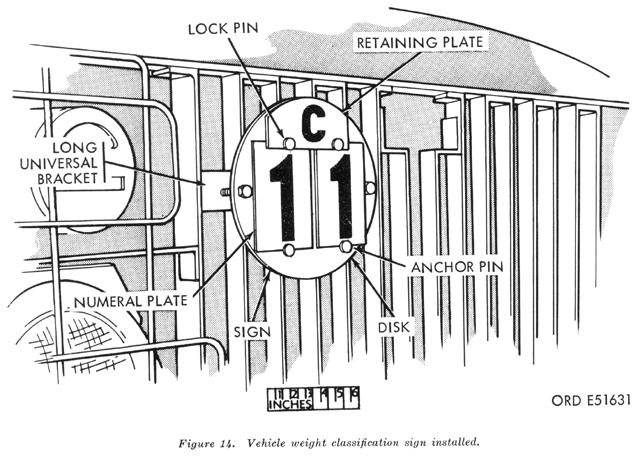
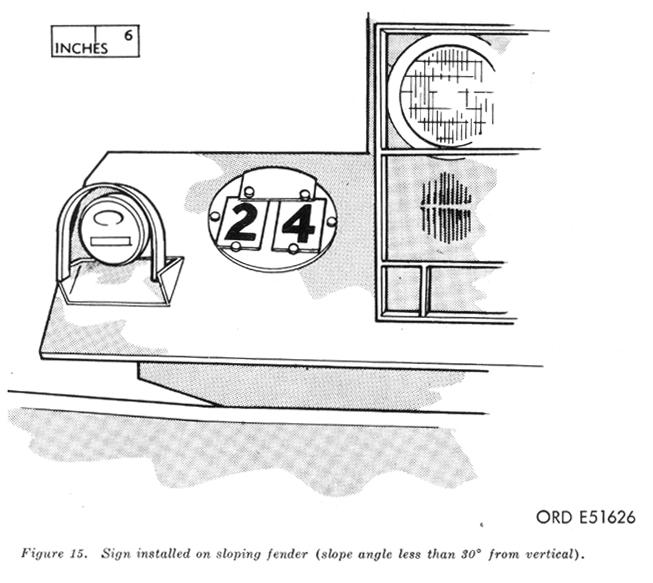
vehicles. These discs were 6 inches in diameter, painted yellow,
bearing black numbers which indicated the weight class of the
vehicles. The discs could either be a metal plate attached to the
vehicle or else painted directly onto the vehicle. They were usually
located on the right front fender, though on many vehicles the disc
replaced the right front headlight. Vehicles pulling trailers would
have two numbers, one indicated the weight class of the vehicle
only, the other the weight class of both vehicle and trailer.
In
order to help bridge sentries determine the weight of vehicles
wanting to cross them, bridging discs were added to Canadian
vehicles. These discs were 6 inches in diameter, painted yellow,
bearing black numbers which indicated the weight class of the
vehicles. The discs could either be a metal plate attached to the
vehicle or else painted directly onto the vehicle. They were usually
located on the right front fender, though on many vehicles the disc
replaced the right front headlight. Vehicles pulling trailers would
have two numbers, one indicated the weight class of the vehicle
only, the other the weight class of both vehicle and trailer.
Trailers were given
double classifications as well; the upper number designated the
increase to be made to the class of the towing vehicle, while the
lower number was the weight class of the trailer on its own.
The system of bridge
classification became commonly used in the summer of 1940. A letter
from the War Office (War Office Letter 57/Vehicles/5940 (SD11))
noted that:
There is at present a considerable risk in war damage to bridges from use by vehicles producing a greater load than that for which a bridge has been designed.
To obviate this risk, it has been decided to adopt a system of classification and marking of bridges and of vehicles.
The 1940 regulations
designated Class 5, 9, 12, 18, and 24 bridges, while by 1944,
regulations stated that bridge classes would include Class 5, 7, 9,
12, 16, 18, 20, 24, 30, 35, 40, 50, 60, and 70.
The number designated
the maximum weight class of vehicles which could safely cross that
type of bridge.
These vehicle weight classifications did not necessarily denote the actual weight in tons of the vehicle (though for tracked vehicles the numbers often coincided.) The classifications were instead derived from considerations such as axle loading, distance between axles, and impact factor.
Bridges were to be marked with signs indicating the class, as was the route on which vehicular traffic would take to the bridge (with sufficient notice given to drivers who would need to divert due to their vehicle's weight).
Vehicles were likewise to be classified and marking applied designating the load they would impose on a bridge. The classes were designated in multiples of one ton, with the minimum being 1. A motorcycle was classified as a Class 1 vehicle, as well, motorcycles and motorcycle combinations (i.e. with sidecar) did not have bridging discs.
Vehicle classifications were rated so that they could cross a bridge with the same, or greater, numerical designation. For example, a Class 12 vehicle could safely cross a Class 12 bridge or a Class 18 bridge, but not a Class 5 bridge.
Vehicles towing guns or trailers were given double classifications; when marked on vehicles, the upper number designated the class of the complete "train" (i.e. vehicle and gun/trailer/limber etc.) while the lower number designated the class of the "tractor" (vehicle) alone.
Vehicles towing other vehicles had the classifications of both vehicles added to determine the overall classification.
Engineers were responsible for applying the correct classification to all the bridges they erected, and for marking both the bridge and the routes.
These vehicle weight classifications did not necessarily denote the actual weight in tons of the vehicle (though for tracked vehicles the numbers often coincided.) The classifications were instead derived from considerations such as axle loading, distance between axles, and impact factor.
Bridges were to be marked with signs indicating the class, as was the route on which vehicular traffic would take to the bridge (with sufficient notice given to drivers who would need to divert due to their vehicle's weight).
Vehicles were likewise to be classified and marking applied designating the load they would impose on a bridge. The classes were designated in multiples of one ton, with the minimum being 1. A motorcycle was classified as a Class 1 vehicle, as well, motorcycles and motorcycle combinations (i.e. with sidecar) did not have bridging discs.
Vehicle classifications were rated so that they could cross a bridge with the same, or greater, numerical designation. For example, a Class 12 vehicle could safely cross a Class 12 bridge or a Class 18 bridge, but not a Class 5 bridge.
Vehicles towing guns or trailers were given double classifications; when marked on vehicles, the upper number designated the class of the complete "train" (i.e. vehicle and gun/trailer/limber etc.) while the lower number designated the class of the "tractor" (vehicle) alone.
Vehicles towing other vehicles had the classifications of both vehicles added to determine the overall classification.
Engineers were responsible for applying the correct classification to all the bridges they erected, and for marking both the bridge and the routes.
Staff and Provost
service were responsible for planning any necessary diversions of
traffic too heavy to safely cross a bridge, as well as traffic
control points.
Unit commanders were responsible for ensuring all vehicles on the charge of their units were properly marked.
Each vehicle was to have its bridging classification marked with a black numeral(s) on a yellow disc attached to, or painted on, the front of the vehicle. As can be surmised, this was problematic in the field, and Canadian Army Training Memorandum No. 22 (published January 1943) reprinted a quick note from the British Army Training Memorandum No. 44 advising that "Excellent work in camouflaging parked vehicles against ground observation is often ruined by failure to cover vehicle classification signs. These are designed so that they may be visible at a considerable distance, and unless they are actually covered they will attract attention to vehicles that would otherwise escape detection. They show clearly through garnished netting, and must be specially covered."
Unit commanders were responsible for ensuring all vehicles on the charge of their units were properly marked.
Each vehicle was to have its bridging classification marked with a black numeral(s) on a yellow disc attached to, or painted on, the front of the vehicle. As can be surmised, this was problematic in the field, and Canadian Army Training Memorandum No. 22 (published January 1943) reprinted a quick note from the British Army Training Memorandum No. 44 advising that "Excellent work in camouflaging parked vehicles against ground observation is often ruined by failure to cover vehicle classification signs. These are designed so that they may be visible at a considerable distance, and unless they are actually covered they will attract attention to vehicles that would otherwise escape detection. They show clearly through garnished netting, and must be specially covered."
Vehicle Types
Military Training Pamphlet 74 Part IV published in May 1944 listed the following vehicle types and their bridge classifications (the list is also useful for providing a look at vehicle designations as the army of the time used them):
Military Training Pamphlet 74 Part IV published in May 1944 listed the following vehicle types and their bridge classifications (the list is also useful for providing a look at vehicle designations as the army of the time used them):
| Category | Type | Vehicle | Class |
| "A" vehicles: Armoured Cars | Scout Car | Lynx II, 4x4, 81 wb | Class 5 |
| Scout Car | Humber I, 4x4, 91 wb | Class 4 | |
| Armoured Car | Daimler Mark 1, 4x4, 102 wb | Class 7 | |
| Armoured Car | Humber Mark IV, 4x4, 102 wb | Class 7 | |
| Armoured Car | Staghound, T17EI, 4x4, 120 wb | Class 15 | |
| Armoured Car, AA | Staghound, T17E2, 4x4, 120 wb | Class 15 | |
| Armoured Car, Command | Staghound, T17EI, 4x4, 120 wb | Class 15 | |
| Armoured Car, Control | Staghound, T17EI, 4x4, 120 wb | Class 15 | |
| Armoured Command Vehicle, High Power | Matador, 4x4, 151 wb | Class 12 | |
| Armoured Command Vehicle, Low Power | Matador, 4x4, 151 wb | Class 12 | |
| "A" vehicles: Universal Carriers | Carrier, Universal | No. 3, Mark II, Welsh Guard Stowage | Class 4 |
| Carrier, Medium Machine Gun | No. 3, Mark 11 | Class 4 | |
| Carrier, 3-Inch Mortar | No. 3, Mark II | Class 4 | |
| Carrier, Universal, T16 | T16, Mark I | Class 4 | |
| Carrier, 4.2-Inch Mortar | T16, Mark I | Class 4 | |
| Carrier, Universal | Windsor | Class 5 | |
| "A" vehicles: Tanks | Tank, Light | Stuart V, M3A3 | Class 14 |
| Armoured Gun Tower | Ram II | Class 30 | |
| Armoured Personnel Carrier | Ram II | Class 30 | |
| Tank, Bridge Laying | Valentine | Class 18 | |
| Tank, Command | Sherman, M4A2 or M4A4 | Class 33 | |
| Tank, Control | Sherman, M4A2 or M4A4 | Class 33 | |
| Tank, Cruiser | Sherman, M4A2 or M4A4 | Class 33 | |
| Tank, Cruiser | Sherman VC, M4A4 | Class 33 | |
| Tank, Observation Post | Ram II | Class 30 | |
| Tank, Observation Post | Sherman, M4A2 or M4A4 | Class 33 | |
| Tank, Recovery | Sherman, M4A4 | Class 33 | |
| "A" vehs: Self Propelled Guns | 25-Pr, Self-Propelled, Tracked | Sexton | Class 30 |
| 3-Inch, M10, Self-Propelled, Tracked | Sherman, M10 | Class 33 | |
| 17-Pr, M10, Self-Propelled, Tracked | Sherman, M10 Chassis | Class 33 | |
| "B" Vehicles | Motorcycle, Solo, Light | Matchless single cylinder | Class 1 |
| Motorcycle, Solo, Light | Norton single cylinder | Class 1 | |
| Motorcycle, Solo, Heavy | Harley-Davidson twin | Class 1 | |
| Car, 5-cwt | Jeep, 5-cwt, 4x4, 80 wb | Class 1 | |
| Car, Light | Sedan, Ford 4 x 2, 114 wb | Class 2 | |
| Car, Light | Sedan, Chevrolet 4x2. 116 wb | Class 2 | |
| Car, Light | Sedan, Dodge 4 x 2, 117 wb | Class 2 | |
| Station Wagon | Ford C11AD, 4X2, 114 wb | Class 3 | |
| Station Wagon | Ford 7-pass, 4X2, 114 wb | Class 3 | |
| Car, Heavy | Buick 4900, 4x2, 139 wb | Class 3 | |
| "B" Vehicles: Armoured Cars | Car, Light Reconnaissance | Otter 1,4x4, 101 wb | Class 3 |
| Car, Light Reconnaissance | Humber, Mark III. 4x4. 112 wb | Class 3 | |
| "B" Vehicles | Truck, 8-cwt, GS | Chev/Ford C/F 8 8-cwt. 4x2. 101 wb | Class 3 |
| Truck, Heavy Utility, Cipher Office | Chev C8A Heavy utility, 4x4, 101 wb | Class 3 | |
| Truck, Heavy Utility, Computer | Chev C8A Heavy utility, 4x4, 101 wb | Class 3 | |
| Truck, Heavy Utility, Machinery "ZL" | Chev C8A Heavy utility, 4x4, 101 wb | Class 3 | |
| Truck, Heavy Utility, Personnel | Chev C8A Heavy utility, 4x4, 101 wb | Class 3 | |
| Truck, Heavy Utility, Wireless | Chev C8A Heavy utility, 4x4, 101 wb | Class 3 | |
| "B" Vehicles: Armoured Cars | Truck, 15-cwt, Armoured | Chev C15TA 15-cwt, 4x4, 101 wb | Class 5 |
| Truck, 15-cwt, Armoured | White M3A1, 15-cwt, 4x4, 131 wb | Class 5 | |
| Truck, 15-cwt, Half-Track | International M-14, 15-cwt, half-track, 135 wb | Class 8 | |
| "B" Vehicles | Truck, 15-cwt, Battery Charging | Chev/Ford C/F 15A 15-cwt, 4x4, 101 wb | Class 5 |
| Truck, 15-cwt, Fitted for Wireless | Chev C15A 15-cwt, 4x4, 101 wb | Class 4 | |
| Truck, 15-cwt, GS | Chev C15A 15-cwt, 4x4, 101 wb | Class 4 | |
| Truck. 15-cwt, GS | Ford F15A 15-cwt, 4x4, 101 wb | Class 4 | |
| Truck, 15-cwt. LW(V) | Chev/Ford C/F 15A 15-cwt, 4x4, 101 wb | Class 4 | |
| Truck. 15-cwt, Machinery "KL" | Ford F15A 15-cwt, 4x4, 101 wb | Class 5 | |
| Truck, 15-cwt. Water | Chev C15A 15-cwt, 4x4, 101 wb | Class 5 | |
| Truck, 15-cwt, Wireless | Chev C15A 15-cwt, 4x4, 101 wb | Class 5 | |
| Lorry, 30-cwt, GS | Chev/Ford C/F 30 30-cwt, 4x4, 134 wb | Class 5 | |
| Lorry, 3-ton, Ambulance | Ford F60L 3-ton, 4x4, 158 wb | Class 9 | |
| Lorry, 3-ton, Battery Storage | Chev C60L 3-ton, 4x4, 158 wb | Class 7 | |
| Lorry, 3-ton, Bulk Petrol | Chev C60L 3-ton, 4x4, 158 wb | Class 8 | |
| Lorry, 3-ton, Caravan | Chev C60L 3-ton, 4x4, 158 wb | Class 5 | |
| Lorry, 3-ton, Cipher Office | Chev C60L 3-ton, 4x4, 158 wb | Class 8 | |
| Lorry, 3-ton, Command High Power "H 53" | Chev C60L 3-ton, 4X4, 158 wb | Class 8 | |
| Lorry, 3-ton, Command Low Power | Chev C60L 3-ton, 4x4, 158 wb | Class 8 | |
| Lorry, 3-ton, Dental | Chev C60L 3-ton, 4x4, 158 wb | Class 6 | |
| Lorry, 3-ton, Derrick | Ford F 60S 3-ton, 4x4, 134 wb | Class 8 | |
| Lorry, 3-ton, Disinfector | Chev C60L 3-ton, 4x4, 158 wb | Class 5 | |
| Lorry, 3-ton, GS | Chev C60L 3-ton, 4x4, 158 wb | Class 7 | |
| Lorry, 3-ton, GS | Ford F60L 3-ton, 4x4, 158 wb | Class 7 | |
| Lorry, 3-ton, GS Medical | Chev C60L 3-ton, 4x4, 158 wb | Class 5 | |
| Lorry, 3-ton, GS Stores (Binned) | Chev/Ford C/F 60L 3-ton, 4x4, 158 wb | Class 8 | |
| Lorry, 3-ton, Instrument Repair | Chev C60L 3-ton, 4X4, 158 wb | Class 8 | |
| Lorry, 3-ton, Machinery "B", Mk II | Ford F60L 3-ton, 4X4, 158 wb | Class 7 | |
| Lorry, 3-ton, Machinery "D-l" | Chev C60L 3-ton, 4x4, 158 wb | Class 6 | |
| Lorry, 3-ton, Machinery "I" | Chev C60L 3-ton, 4x4, 158 wb | Class 7 | |
| Lorry, 3-ton, Machinery "1-30" | Chev C60L 3-ton, 4x4, 158 wb | Class 7 | |
| Lorry, 3-ton, Machinery "J" | Chev C60L 3-ton, 4x4, 158 wb | Class 6 | |
| Lorry, 3-ton, Machinery "M", Mk II | Ford F60L 3-ton, 4x4, 158 wb | Class 8 | |
| Lorry, 3-ton, Machinery "Z", Mk II | Ford F60L3-ton, 4x4. 158 wb | Class 7 | |
| Lorry, 3-ton, Mobile Kitchen | Chev/Ford C/F 60L 3-ton, 4x4, 158 wb | Class 7 | |
| Lorry, 3-ton, Mobile Operations Room | Bedford QLR 3-ton, 4x4, 143 wb | Class 6 | |
| Lorry, 3-ton, Office (House type) | Chev C60L 3-ton, 4x4, 158 wb | Class 7 | |
| Lorry, 3-ton, Power Auger | Chev/Ford C/F 60L 3-ton, 4x4, 134 wb | Class 8 | |
| Lorry, 3-ton, 20-MM Quad, Self-Propelled | Ford F60L 3-ton, 4x4, 134 wb | Class 8 | |
| Lorry, 3-ton, 40-MM, Self-Propelled | Ford F60B 3-ton, 4x4, 134 wb | Class 7 | |
| Lorry, 3-ton, Signals (Cable Layer) | Chev/Ford C/F 60L 3-ton, 4x4, 134 wb | Class 8 | |
| Lorry, 3-ton, Signal Construction | Chev C60L 3-ton, 4x4, 134 wb | Class 8 | |
| Lorry, 3-ton, Teleprinter | Chev C60L 3-ton, 4x4, 158 wb | Class 8 | |
| Lorry, 3-ton, TEV Corps | Terminal equipment vehicle Chev C60L, 3-ton, 4x4, 158 wb | Class 8 | |
| Lorry, 3-ton, TEV Div | Terminal equipment vehicle, Chev C60L 3-ton, 4x4, 158 wb | Class 8 | |
| Lorry, 3-ton, Tipping | Chev C60S 3-ton, 4x4, 134 wb | Class 8 | |
| Lorry, 3-ton, Troop Carrying Vehicle | Bedford QLD 3-ton, 4x4, 143 wb | Class 7 | |
| Lorry, 3-ton. Wireless "C 33" | Chev C60L 3-ton, 4X4, 134 wb | Class 8 | |
| Lorry, 3-ton, Wireless "I" | Chev C60L 3-ton, 4x4, 158 wb | Class 8 | |
| Lorry, 3-ton, Wireless "R" | Chev C60L 3-ton, 4x4, 158 wb | Class 8 | |
| Lorry, 3-ton, 6-wh, Bacteriological Laboratory | Chev 60X 3-ton, 6x6, 160 wb | Class 9 | |
| Lorry, 3-ton, 6-wh, Camera | Leyland Retriever Chev 60X3-ton, 6x4, 156 wb | Class 9 | |
| Lorry, 3-ton, 6-wh, Chemical Warfare Laboratory | Chev 60X 3-ton, 6x6, 160 wb | Class 9 | |
| Lorry, 3-ton, 6-wh, Dark Room | Leyland Retriever 3-ton, 6x4, 156 wb | Class 9 | |
| Lorry, 3-ton, 6-wh, Machinery "A" | Chev 60X3-ton, 6x6, 160 wb | Class 9 | |
| Lorry, 3-ton, 6-wh, Machinery "B" | Chev 60X3-ton, 6x6, 160 wb | Class 9 | |
| Lorry, 3-ton, 6-wh, Machinery "F" | Chev 60X3-ton, 6x6, 160 wb | Class 8 | |
| Lorry, 3-ton, 6-wh, Machinery "L" | Chev 60X 3-ton, 6x6, 160 wb | Class 9 | |
| Lorry, 3-ton, 6-wh, Machinery "RE 7 1/2 -KW" | Chev 60X 3-ton, 6x6, 160 wb | Class 9 | |
| Lorry, 3-ton, 6-wh, Machinery "Z" | Chev 60X 3-ton, 6x6, 160 wb | Class 9 | |
| Lorry, 3-ton, 6-wh, Mobile Petroleum Laboratory | Chev 60X 3-ton, 6x6, 160 wb | Class 9 | |
| Lorry, 3-ton, 6-wh, Printing | Leyland Retriever 3-ton, 6x4, 156 wb | Class 9 | |
| Lorry, 3-ton, 6-wh, Stores | Chev 60X 3-ton, 6x6, 160 wb | Class 9 | |
| Lorry, 3-ton, 6-wh, Switchboard | Chev 60X 3-ton, 6x6, 160 wb | Class 9 | |
| Lorry, 3-ton, 6-wh, TEV Army (Terminal equipment vehicle) | Chev 60X3-ton, 6x6, 160 wb | Class 9 | |
| Lorry, 3-ton, 6-wh, TEV | Chev 60X 3-ton, 6X6, 160 wb | Class 9 | |
| Lorry, 3-ton, 6-wh, X-Ray | Ford F60H 3-ton, 6x4, 160 wb | Class 8 | |
| Lorry, 4-ton, 6-wh, Crane, Mark VI (Coles Crane) | Diamond T 970 4-ton, 6x6, 201 wb | Class 9 | |
| Lorry, 4-ton, 6-wh, Crane, Mark VII (Bay City Crane) | Diamond T 970 4-ton. 6x6, 201 wb | Class 12 | |
| Lorry, 4-ton, 6-wh, FBE | Diamond T 970 4-ton, 6x6, 201 wb | Class 12 | |
| Lorry, 4-ton, 6-wh, GS | Diamond T 970 4-ton, 6x6, 201 wb | Class 11 | |
| Lorry, 4-ton, 6-wh, Machinery "H" | Diamond T 970 4-ton, 6x6, 201 wb | Class 12 | |
| Lorry, 4-ton, 6-wh, Machinery "M" | Diamond T 9704-ton, 6x6, 201 wb | Class 12 | |
| Lorry, 4-ton, 6-wh, Machinery "RE 25-KW" | Diamond T 970 4-ton, 6x6, 201 wb | Class 12 | |
| Lorry, 4-ton, 6-wh, Pontoon | Diamond T 970 4-ton, 6x6, 201 wb | Class 11 | |
| Lorry, 6-ton, GS | Mack NR 6-ton, 6x6, 177 wb | Class 17 | |
| Lorry, 10-ton, Auto Processing | Foden D6G 10-ton, 6x4, 188 wb | Class 18 | |
| Lorry, 10-ton, Breakdown | Ward La France M1A1 10-ton, 6X6, 181 wb | Class 14 | |
| Lorry, 10-ton, Enlarging and Rectifying | Foden D6G 10-ton, 6x4, 188 wb | Class 18 | |
| Lorry, 10-ton, 6x4, GS | Mack NM 10-ton, 6x4, 201 wb | Class 21 | |
| Lorry, 10-ton, 6x6, GS | Mack NR 10-ton, 6x6, 177 wb | Class 21 | |
| Lorry, 10-ton, Photo Mechanical | Foden D6G 10-ton, 6x4. 188 wb | Class 18 | |
| Lorry. 10-ton, Printing | Foden D6G 10.ton.6x4, 188 wb | Class 18 | |
| Tractor, Field Artillery | Chev/Ford CGT/FGT FAT, 3-ton, 4X4, 101 wb | Class 6 | |
| Tractor, Light AA | Chev/Ford C/F 60S 3-ton, 4 X 4, 134 wb | Class 6 | |
| Tractor, Artillery, Medium | FWD SU-COE 4-ton, 4x4, 144 wb | Class 12 | |
| Tractor, Breakdown, Light | Chev C60S 3-ton, 4x4, 134wb | Class 7 | |
| Tractor, Breakdown, Medium | Diamond T 969 4-ton, 6x6, 151 wb | Class 11 | |
| Tractor, Breakdown, Heavy | Mack LM-SW 5-ton, 6x4, 166 wb | Class 12 | |
| Tractor, D-4 | Caterpillar | Class 9 | |
| Tractor. D-7 | Caterpillar | Class 18 | |
| Tractor, D-8 | Caterpillar | Class 24 | |
| Transporter, 16-ton, (Tractor) | FWD SU-COE 4-ton, 4x4, 144 wb | Class 12 | |
| Transporter, 16-ton, (Trailer) | Semi-trailer, 16-ton | Class 7 | |
| Transporter, 20-ton, (Tractor) | Federal 604 6-ton, 6 x 4, 168 wb | Class 13 | |
| Transporter, 20-ton, (Trailer) | Semi-trailer 20-ton | Class 7 | |
| Transporter, Recovery, 30-ton, (Tractor) | Diamond T 980 12-ton, 6x4 179 wb | Class 13 | |
| Transporter, Recovery, 30-ton, (Trailer) | Semi-trailer ,30-ton | Class 22 | |
| Transporter, Recovery, 40-ton, (Tractor) | Diamond T 980 12-ton, 6 x4 179 wb | Class 18 | |
| Transporter, Recovery, 40-ton, (Trailer) | Full trailer, 40-ton | Class 10 |
Trailers
|

|
|
Speed Limit
Markings
In 1942,
markings were introduced to indicate the maximum speed that
vehicles were permitted to operate at (measured in miles per
hour - Canada and Britain did not operate on the metric
system in the 1940s). These were stickers applied to the
lower corner of the driver's side front windshield. The
sticker was coloured red on the outside and black on the
inside. Vehicles without windshields had them applied where
the driver could see them. These markings were also
sometimes simply stencilled on.
In 1943,
khaki coloured metal signs measuring 7 inches by 2 inches
were to be placed on the lower right side of the windshield,
with the speed limit stencilled in red on the front and
black on the back.
|
 Wartime photo of a CWAC driving a jeep. Note the speed limit sticker in the corner of the windshield. DND Photo. |
Blackout Markings
 For
blackout driving, the rear axle housing of some vehicles was painted
white. On other vehicles a white disc was mounted underneath the
rear of the vehicle so as to be visible to drivers following behind.
Some units painted their unit serial on this disc in black to
further aid in recognition. On later model vehicles, these discs
were illuminated by a light controlled separately by the driver. In
England, after VE-Day, and even during hostilities, some units
painted other prominent areas of vehicles white to aid in
recognition at night, usually on the outer edges of the vehicle so
as to make passing safer, to recognize the silhouette of the
vehicle, or make protuberances obvious, such as side view mirrors,
safety handles, etc.
For
blackout driving, the rear axle housing of some vehicles was painted
white. On other vehicles a white disc was mounted underneath the
rear of the vehicle so as to be visible to drivers following behind.
Some units painted their unit serial on this disc in black to
further aid in recognition. On later model vehicles, these discs
were illuminated by a light controlled separately by the driver. In
England, after VE-Day, and even during hostilities, some units
painted other prominent areas of vehicles white to aid in
recognition at night, usually on the outer edges of the vehicle so
as to make passing safer, to recognize the silhouette of the
vehicle, or make protuberances obvious, such as side view mirrors,
safety handles, etc.
This photo is captioned in Library and Archives Canada as a Carrier of the South Saskatchewan Regiment, thought the unit marking appears to be a "68", denoting The Queen's Own Cameron Highlanders of Canada. The photo was taken in Normandy in July 1944 and the range of markings is typical for a Universal Carrier.
Bridging discs were also seen as just a yellow outline with black numeral. Note the location of the WD number. Sergeant H. Louis and Private T.F. McCann are both from the Royal Hamilton Light Infantry. Unit and Formation Signs were commonly placed on the lower hull of Carriers rather than the mudguards. LAC Photo.


Commanders Pennants
|
Cars
belonging to formation commanders flew a small pennant
indicating the formation.
Vehicles
belonging to unit Commanding Officers and Staff Officers
were identified at night by means of a lighted sign fitted
to the right rear fender. A triangular or square holder
approximately 9 inches by 4-1/2 inches was fitted with two
translucent panels approximately 3-1/2 inches square,
containing a formation or unit sign in the top panel and a
formation or unit flag and/or serial number in the lower
panel. Despatch Rider signs could also be placed below the
lower panel and lit by a separate switch on the dash of the
vehicle.
|
 Pennant denoting the Commanding Officer of The South Saskatchewan Regiment of the 2nd Canadian Infantry Division. Photo taken through a glass frame at the Royal Canadian Legion in Weyburn, SK, 2001. |
|
There were
also regulations early in the war for the flying of tactical
flags from aerials in armoured units to designated different
commanders' vehicles.
|
National Identification
 Recognition
markings were used to identify vehicles to friendly forces,
especially aircraft. Canadian armoured vehicles in the United
Kingdom used a red/white/red recognition flash which was a holdover
from the First World War. The 14th Canadian Tank Regiment (The
Calgary Regiment) used this style of recognition mark on its
vehicles at Dieppe, and Canadian AFVs in the Mediterranean also
commonly employed this style of AFV recognition marking.
Recognition
markings were used to identify vehicles to friendly forces,
especially aircraft. Canadian armoured vehicles in the United
Kingdom used a red/white/red recognition flash which was a holdover
from the First World War. The 14th Canadian Tank Regiment (The
Calgary Regiment) used this style of recognition mark on its
vehicles at Dieppe, and Canadian AFVs in the Mediterranean also
commonly employed this style of AFV recognition marking.In 1942, rondels were to be painted on all other vehicles, of the same type used by Royal Air Force and Royal Canadian Air Force aircraft, usually located on the hood.
 |
 |
By June 1944, all
Allied vehicles going into Northwest Europe were to have the five
pointed American star painted on them instead. These stars sometimes
had a circle, either broken or unbroken, painted around them as
well. Canadian units often painted the star on crooked in order to
differentiate themselves from American units.
 |
 |
Headquarters First
Canadian Army published the following order dated 11 April 1944:
|
Recognition of Vehs
by Allied Aircraft
|
Personnel of the 2nd 7th Reconnaissance Regiment (17th Duke of York’s Royal Canadian Hussars) transfer from a "Seep" (amphibious jeep) to a Chevrolet C15A truck serving as the unit bus at Weener, Germany on 13 February 1946. Conspicuous vehicle markings include the formation sign of the 3rd Canadian Division, CAOF on each vehicle (the French-Grey marking of the 3rd Division was retained by the CAOF), War Department numbers, a speed limit marking on the windshield (35mph) of the 15-cwt, faded white blackout markings on the bumper, lift rings, and rear view mirror of the truck, and unit signs. The Arm of Service flash (green over blue) of a reconnaissance unit is evident on the truck; the jeep appears to have a blue/yellow/red AoS flash indicating a RCEME unit. Just visible in the photo are unit and formation signs on the upper bonnet of the truck, and what appears to be a tactical sign on the door of the truck. The "BUS" sign is an unofficial addition by the unit.
Personnel of 2nd Canadian Infantry Division Signals examine a Ford three-ton lorry which sank into a ditch on the Beveland Causeway on 27 October 1944. The Bridge Classification disc is clearly visible, as is the War Department number in regulation location with "CL" prefix, and a white recognition star, painted upside-down. A unit serial or other information has been chalked onto the bumper.


Korean War
Canadian Army vehicle markings in Korea were much the same as those used during the Second World War. Major changes were WD Numbers, which no longer used a "C" or vehicle type prefix letter. Instead, all WD numbers were prefixed with "CDN". Roundels were not used, though five pointed stars, without the circle surround used in 1944-45, were still in use to identify Canadian vehicles to friendly troops. Several different nations contributed to both the United Nations effort in Korea as a whole, and the 1st Commonwealth Division which was a true multi-national formation.
Unit signs were still used in Korea, of the same type used in the Second World War. Formation signs consisted of either the 25th Canadian Brigade patch, the Commonwealth brigade patch, or both. These signs seem to have been hand painted at times, with a large variety of colours used for the Commonwealth sign, ranging from sky blue to dark blue. These signs were also painted on a shield-shaped background different from the patches worn on uniforms; the tops of the signs were straight across.
 |
 |
Left: 1/35 scale model by Steve Guthrie, depicting Brigadier Rockingham's command vehicle. The red plate with star affixed is an affectation adopted by American general officers; the one star depicts the rank of Brigadier General. Model and photo courtesy Steve Guthrie.Right: Photo on which the above model was based; note the Commonwealth Division badge is also present. Public Archives of Canada photo 115809 (P.E. Tomelin).


1950s - 1960s
Marking schemes
continued to develop after the Korean War; War Department numbers
gave way to CAR (Canadian Army Registration) numbers, in the format
YY-XXXXX.
YY was the last two digits of the
year in which the vehicle entered Canadian service, followed by a
dash and then a 5-digit number unique to the vehicle. For example:
54-82501. Unlike the wartime Census Numbers, the 5 digits were not
related to the number of vehicles acquired in any given year. These
numbers were painted on vehicles in a manner similar to the previous
Census Numbers.
New unit
and formation signs evolved; the Royal Canadian Armoured Corps
adopted a diagonal red/yellow Arm of Service flash, which was in use
by the time Canadian tanks served in Korea. The 4th Canadian
Infantry Brigade Group that served in West Germany re-adopted the
1st Canadian Infantry Division formation sign, while Militia
formations in Canada adopted new ones.9
After Unification circa 1967 serial
numbers assigned to vehicles of the Canadian Forces were called CFR
- Canadian Forces Registration Number. The CFR was a unique 5 digit
number that identified one particular vehicle, prefixed by the last
two digits of the year of adoption of the vehicles.
This number was painted on vehicles,
with the prefix deleted. Later, metal license plates similar to
civilian license plates were commonly used.
 |
 |
 |
| Left:
Cougar
AVGP with stenciled CFR, Petawawa, 1981. Photo
courtesy Ed Storey.
Centre: Chevrolet 1-1/4 ton
signals truck, Ottawa. Photo courtesy Ed Storey. Right: M135CDN truck with CFR plate, Ottawa. Photo courtesy Ed Storey |
||
As weapons systems evolved, became deadlier, more accurate and able to destroy targets on a one-hit basis, the need for markings and paint schemes on equipment continued to be evaluated against the need for camouflage and concealment. Leopard tanks, for example, purchased in the 1970s, were provided with special paint to defeat infra-red detection. The use of electronic identification devices (IFF, or Identification Friend or Foe) and increased situational awareness on the battlefield mitigated, in theory, the need for large and permanent markings of the type employed in Normandy in 1944. In the 1970s and onwards, vehicle markings became subdued in nature and colourful unit markings, like scarlet doublets and feathered bonnets, a thing of the past as far as armies on campaign were concerned.
Notes
-
Of particular help with this information was an article by Richard Yuke of Moose Jaw, SK which originally appeared in Army Motors Magazine, Number 48 (Spring 1989). Additional information can be found in the references section, below.
-
Guthrie, Steve and Barry Beldam Camouflage & Markings of Canadian Armored Vehicles in World War Two (Part 2) (Model Centrum Progres, Warsaw, Poland, 2009) ISBN 978-83-60672-09-9
-
Hodges, Peter and Michael D. Taylor British Military Markings 1939-1945 (Cannon Publications, Retford, Nottinghamshire, UK, 1994) ISBN 1-899695-00-1 pp.131-132
-
A prime resource for information in this section has been the Milifax website, with no credit information though Mick Starmer, Mike Cooper and Michael Hodges of the Model Armoured Fighting Vehicle Association were credited on that site.
-
Dingwall, Don Canadian Vehicle Markings: A Comprehensive Guide to the Colours and Markings of the Canadian Army Overseas During WWII (Canadian Tracks Publishing, Carp, ON)
-
Letter from Colonel Ernest Sansom, Assistant Adjutant & Quartermaster General, 1st Canadian Division, 28 May 1940, reproduced in Dingwall, Ibid.
-
Letter from Major General P.J. Montague, Senior Officer, CMHQ, dated 8 Dec 1943, reproduced in Dingwall, Ibid
-
One early war reference appears to state 5-1//2" for the height rather than 3-1/2".
-
Beldam, Barry. Canadian Vehicle Markings Volume 1: Unit and Formation Markings of the Canadian Army Overseas 1939 to 1967 (Revised Edition 6) (Self-Published)

 The camp was the brainchild of Donna Bennett, who was disturbed about the homework her 10-year-old was bringing home from his fifth-grade classroom, according to